Although one always wishes for a trouble-free birthing season with easy birthings, good mothering and crias that are not only able to nurse, but their mother is able to provide all their nutritional needs, this doesn’t always happen. Occasionally a female dies and leaves an orphan cria or doesn’t have milk, or just doesn’t want to nurse her cria. Or perhaps she isn’t able to provide sufficient milk for her growing cria for some reason. So what do you do now?
The following is intended as a guide for bottle-feeding newborn crias. Please note that this is just a guide and if the cria is getting some milk from its dam, then it may not take the volumes suggested. Also as the cria grows older, it may start to get more out of other feedstuffs such as hay and concentrates and need less supplementation from a bottle.
Equipment Needed
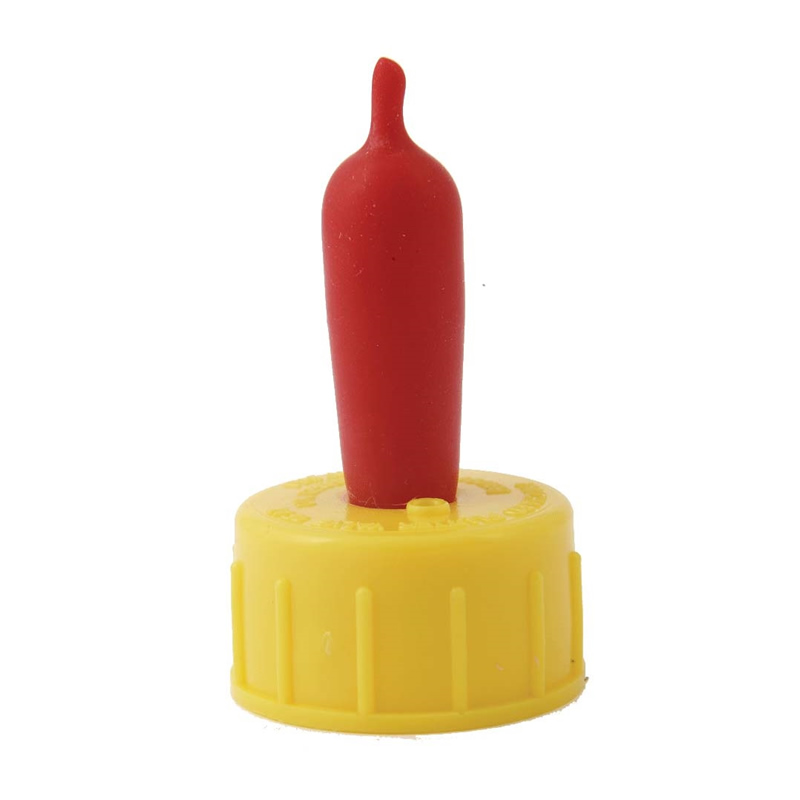
- A feeding bottle: one used for lambs is appropriate. Some lamb feeding teats, like those shown in Figures 1 and 2, fit perfectly onto soda bottles and these can be used as replacement bottles if needed! Human feeding bottles can also work well but use the nipples designed for older babies as these have more holes and allow for a greater flow rate.
- Spare teats in case replacement is needed (can be purchased alone). The rubber will tire and teats are a perfect place for bacterial and mould growth so should be replaced regularly.
- Weigh scales: weigh the cria in order to determine correct 24 hour feeding volume – see below. Weigh the cria daily to begin with to assess adequacy of your feeding strategy, especially if getting some milk from the mother and some from the bottle.
- Calculator to figure out the correct feeding volume based on cria body weight (see text) and a notebook to record both cria weights and volumes fed.
- Hot water, washing up liquid and a bottle brush for cleaning out the bottles after each use. Rinse with boiling water. Do not leave bottles sitting around between feeds.
- Milk! In order of preference: mother’s own milk, goat’s milk, cow’s milk or replacer. Note that if the cria is less than 24 hours old, fresh or frozen (thawed) colostrum should ideally be used to feed the cria in order to avoid failure of antibody transfer (or failure of passive transfer, FPT) since crias need to acquire all their antibodies from their mother’s milk. Note that some diseases can be transmitted from infected colostrum – for example, TB, Johnes disease and BVD. Therefore it is important to ensure that you acquire any alternative milk from a disease free source if it is not from your own farm. An alternative would be a colostrum replacer but please note that most powdered products on the market are not replacers but “supplements” as they are quite low in antibodies. A powdered colostrum that has considerably higher IgG (antibody) content is Immucol Platinum. [If you cannot ensure disease-free colostrum, you may consider resorting to plasma transfusions using plasma collected from your own animals.]
- Measuring jug for mixing powdered supplements if using and measuring cups/measures as appropriate to mix product correctly. Any utensils used must be properly cleaned after each use to avoid contamination problems. Any supplements must be stored according to product directions.
Volume and Frequency
As a guide, a cria under 2 months of age requires 10-15% of its body weight on a daily basis and this can be divided into several feedings – for very young crias, this needs to be every other hour if the cria has no other source of nutrition. As they get a little bit older you can increase the volume of feeds fed during the day and try to reduce the number of night-time feeds such that you feed last thing at night (eg 11.30 to midnight) and first thing in the morning (eg 6am) – but do try to do this gradually. Too much at one feed, or more than 15% total volume may cause diarrhoea or colic. It is also important that you don’t force-feed since this can result in milk being breathed into the lungs or going into the wrong stomach and the cria getting sick (they have three stomachs – you want the milk to pass directly to the third stomach). Monitor weight gain also on a daily basis to begin with to ensure that the cria is gaining weight appropriately. As the cria gets older you will be able to gradually increase the volume of the feedings and reduce the frequency so that it is not necessary to feed overnight. However, do not increase the volume too rapidly as colic may result.
| Weight lb | Weight kg | Min volume to feed 10% of Body Weight (ml / oz) | Max volume to feed 15% of Body Weight (ml / oz) | Suggested feed volume (ml / oz) |
| 15 | 7 | 700ml / 23oz | 1000ml / 33oz | 60-120ml / 2-4oz every 2-4 hrs |
| 20 | 9 | 900ml / 30oz | 1350ml / 45oz | 90-120ml / 3-4oz every 2-4 hrs |
| 25 | 11 | 1100ml / 37oz | 1700ml / 56oz | 90-150ml / 3-5oz every 2-4 hrs |
| 30 | 14 | 1400ml / 46oz | 2000ml / 66oz | 150-210ml / 5-7oz every 2-4 hrs |
| 35 | 16 | 1600ml / 53oz | 2400ml / 80oz | 260-400ml / 8-13oz every 4 hrs |
| 40 | 18 | 1800ml / 60oz | 2700ml / 90oz | 300-450ml / 10-15oz every 4 hrs |
How do you bottle feed?
If the cria’s mother is available, her milk is always the best source of nutrition for the cria, so if she has milk, always try to assist the cria to nurse before attempting to feed it anything else. Starting to bottle feed a cria can be a frustrating experience at the start. Generally I will try to immobilise the cria to some extent when first starting to bottle-feed an uncooperative recipient! Later on, once used to feeds, they will probably just walk up and take the bottle. I have attached a couple of photos that show suggestions for trying to feed a newborn. Figure 4 shows me standing over the cria, stabilising it between my knees and stabilising the head against my body. This allows me two hands free to deal with the cria’s head and the bottle. With my non-dominant hand I place my fingers under the jaw and pop the tip of my thumb into the side of the cria’s mouth to open it up. Then I place the tip of the teat into the cria’s mouth. This will usually cause the cria to suckle but not always. If it doesn’t, try to move the nipple back and forth. If this is unsuccessful, squeeze a little milk into the cria’s mouth to try and stimulate a response. Do not overdo this in case the cria aspirates the milk into its lungs. Some crias will just swallow what you squeeze into the mouth rather than sucking but the aim is to get the cria sucking properly or the bottle-feeding will take a while! Figure 5 shows an approach to bottle-feeding a cushed cria. Again, the positioning aims to stop some of the wriggling that can occur when trying to bottle-feed. With either approach, or any other, try to keep the head and neck straight and in line with the rest of the body to maintain balance and also make it easier for the cria to nurse.
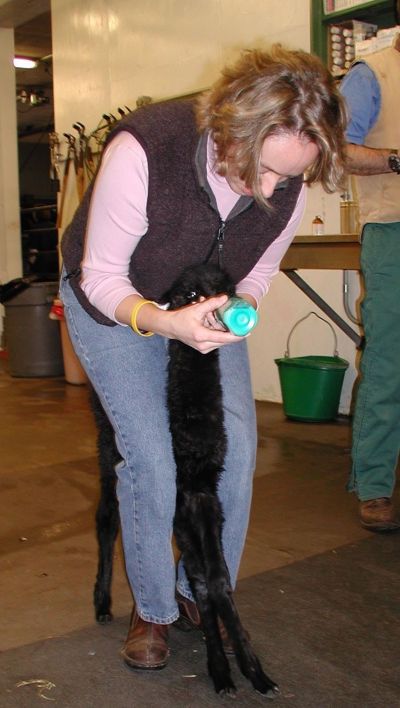
Figure 4. Bottle-feeding a standing cria. 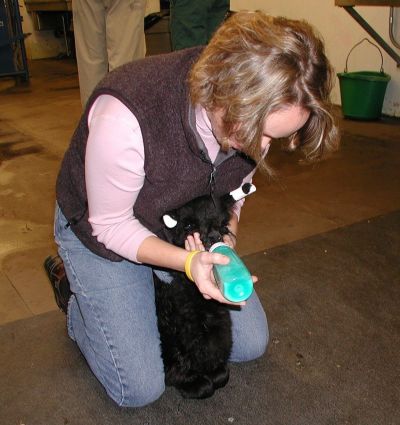
Figure 5. Bottle-feeding a standing cria.
What milk should you use when bottle feeding?
If the mother has died or has no milk, we normally recommend using goat’s milk as a first choice of supplement and this can be fresh (undiluted) or canned which needs to be diluted 50:50 with water since it is condensed milk. Or you can use the powdered varieties, made up using the manufacturer’s guidelines. Goat’s milk is the closest to camelid milk nutritionally. Cow’s milk is also pretty good as a replacement, and can again be fresh or reconstituted from powder.
NEWBORNS!
Remember that colostrum is vital to a newborn cria in order for it to have immunity to common pathogens in its environment. Crias are born without antibodies, unlike humans, and are dependent on those passed to the cria from its mother’s colostrum to protect it within the first few weeks of life. A cria that does not get adequate colostrum in the first 12-24 hours of its life will have failure of passive transfer and if it does not receive a plasma transfusion will probably succumb to infections early on in life. If lucky enough to avoid these, then failure to thrive may be a problem later on.
Therefore, if a cria is not willing to nurse after birth, the first consideration should be to milk the dam and feed this colostrum by bottle. The mother is the best source of colostrum. If insufficient colostrum is available, then another source should be used. Options include stored frozen camelid colostrum, or colostrum from another species, or powdered colostrum. The first choice alternative species would be goat colostrum, then cow. Have a supply of this ready in the freezer in case fresh is not available from your local dairy. Freeze it in small portions up to 120ml in size so that they can be readily defrosted on demand – note that because antibodies are proteins, colostrum must not be heated up too warm or the proteins will denature, just like boiling an egg! Defrost in warm water that is a little warmer than body temperature: do not microwave. If you have a local farmer that you can ask for colostrum, it would be advisable to ask whether they know if their herd is known to be free from TB, Johne’s or BVD. Since these diseases can potentially be transmitted to camelids in unpasteurised milk, it is best to avoid colostrum from animals that may carry these diseases.
Powdered colostrum “supplements” are an alternative that many people have because they are easy to buy and reach for in an emergency. However, most are not “substitutes” or replacement for colostrum unless you use one with a guaranteed high IgG content such as Immucol Platinum – if you use the cheaper supplements, they will provide energy but will not provide the amount of antibodies needed to protect the cria from infections. They will buy you time but you will almost certainly have to consider plasma transfusions using plasma collected from your own animals. So if colostrum isn’t available from the mother, and you can’t get fresh colostrum from a source that you know is safe, use the powdered alternatives, but make sure it’s a good one.
What if the cria won’t take a bottle?
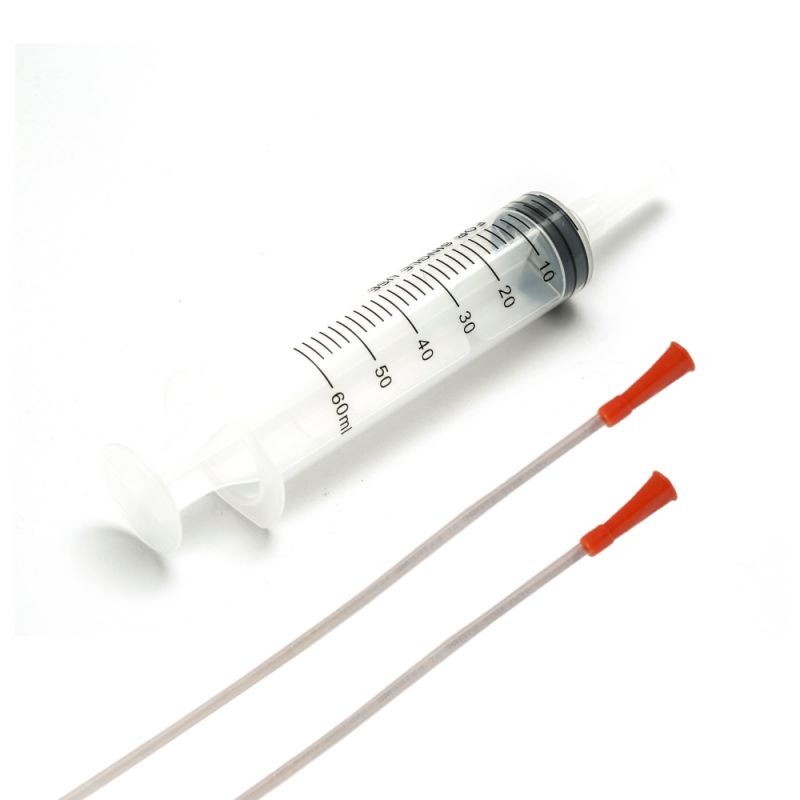
Tube feeding can be done initially if the cria is too weak to stand and nurse and not willing to suckle from a bottle as this will give it a little energy to get up and get going. If you are not sure how to do this, get your vet to show you the first time: it’s crucially important that the tube is swallowed and passes into the oesophagus and that it doesn’t pass into the windpipe! Tube feeding should never be done in a cria that is unable to hold its head up as milk may flow back up to the mouth when the head is laid back down and then be breathed in resulting in aspiration pneumonia. Also, never tube feed more than 90-120ml (3-4 oz) to a newborn cria in one feeding. Do not tube feed on more than 2 occasions as it can cause oesophagitis (inflammation of the oesophagus). There is also an increased risk of milk getting into the wrong stomach because the cria doesn’t swallow when tube-fed and because the larger volume given in one go can overwhelm the oesophageal groove which carries milk (and fluids) straight through to the third stomach compartment. This is a problem because the milk will ferment in the first stomach compartment and can cause a metabolic imbalance due to acidosis. You can try to simulate the volume of each swallow by giving just a little at a time through the tube in a pulsatile manner. If you have to tube-feed more than twice, there is probably a reason why the cria is not getting up and nursing for itself and you should seek veterinary attention.
Other Tips
If you experience a problem with a newborn cria and are not sure whether the cria managed to take on board enough colostrum (and therefore sufficient passive immunity or antibodies acquired from the dam), these crias are good candidates for checking their IgG status. This is a measure of the transfer of passive immunity and you are looking for a minimum of 800 mg/dl, preferably 1000 mg/dl. Additionally, other crias that may be at increased risk and those that you should consider checking IgG are:
- any cria born to maiden (first time) mothers
- any cria born following a difficult birthing because they may be slower to get going
- a cria born to a dam who had a problem cria in previous years
- crias of low birth-weight (for alpacas, less than 7kg)
- premature crias or those that may have the indications of prematurity but be born at full term on the basis of dates (dysmature crias)
- crias born in inclement weather (less ideal conditions to get up and nurse – too cold, or roasting hot!).
Camelid Veterinary Services Ltd is able to offer a cria IgG screening service. You need to get your vet to collect a blood sample to send to us (2ml total volume is sufficient) in a plain serum tube but we can also use EDTA or heparin tubes. The cost of testing is £25 per sample (+VAT). We are also able to provide feeding bottles, replacement teats and feeding tubes with syringes as well as lots of amazingly useful stuff (!), here on our website.

